Static Content User Interface
Table Of Contents
Static Content title
Enter the title for the Static Content. This title will be used by Wordpress to generate the URL for the Static Content.

Permalink
The Permalink is the URL for the Static Content. You can change the end section of the URL by clicking the "Edit" button, entering the new URL, and clicking the "OK" button. The preceding section of the URL, "/content/" in the below example, is based on the Content Group the Static Content is assigned to.

Content Editor
For WordPress versions 5.0 and above, please refer to the link below:
Author
This allows you to set the author of the Static Content. This is generally only used for blog posts.

Yoast SEO
Readability - This tab will give you tips on how to improve the readability of the Static Content.
Enter your focus keywords - This tab allows you to edit the meta title and description, by clicking the "Edit snippet" button. It also allows you to enter some focus keywords, which it will then use to give you tips on how to improve the Static Content from an SEO perspective.
KC: Web
General
Custom CSS File URL - Enter the full URL path for custom CSS files that should be loaded with this Static Content. Paths should be separated by a line break.
Has Own Page - Select if the Static Content should be accessible directly. If this is not set, the Static Content can still be loaded in as part of another page, but won't be accessible if its URL is visited. Any stand-alone Static Content pages must have this selected.
NOTE: If Static Content is not set to have its own page, it will not appear on the XML Sitemap.
Featured Blog Post - Select whether this is a featured blog posts, to be shown in the “KCW Featured Posts” widget.
Popup Timer - Set how long in seconds before the Static Content is displayed in a popup. The Static Content must also be assigned to the "Popup" content group.
Link to Products - Enter a comma-separated list of product slugs (the last section of the product page URL) in order to link this Static Content to that product for use with a "KCW Linked Posts" widget.
Link to Categories – Enter a comma-separated list of category slugs (the last section of the category page URL) in order to link this Static Content to that. This option is only in use on certain themes.
Event Date – Enter a date to display as part of a Blog post, if the post is about an event. This option is only in use on certain themes.
Extra Featured Image – Enter the URL of an image to use as well as the Featured Image on a Blog page. This option is only in use on certain themes.
Customer
Restrict To Customer Group - Set a Customer Group to restrict access to the Static Content to. Customers that are not in the selected group will not be able to access it.
Restrict To Country - Select one or more countries to allow access to this piece of Static Content. Customers not in the selected countries won’t be able to access/see this piece of Static Content.
Login to Browse - Set whether a customer has to be logged in to the website to be able to view this Static Content.
Sitemap
Exclude From Sitemap - Set if this Static Content should be excluded from the XML sitemap. This can be useful for stopping Static Content that is not directly accessible from showing up on the XML sitemap.
Sitemap Change Frequency - Select the change frequency to be used for this Static Content when generating its entry in the XML sitemap. If not set, the default change frequency will be used, which is set within the KC:Web Settings.
Sitemap Priority - Select the priority to be used for this Static Content when generating its entry in the XML sitemap. If not set, the default priority will be used, which is set within the KC:Web Settings.
SEO
Stop this page being indexed - Set if this Static Content should have the "noindex" meta tag, which means search engines won't index the Static Content, and it won't show up in search results.
Stop search engine following links - Set if this Static Content should have the "nofollow" meta tag, which means search engines won't follow links it finds on this page.
Publish
For WordPress versions 5.0 and above, please refer to the link below:
Content Groups
This allows you to assign the Static Content to one or more Content Groups. To assign it to a Content Group, tick the check-box next to the Content Group. If you need to add a new Content Group, you can either do it through the menu by going to "Static Content" -> "Content Groups", or you can click "Add New Content Group" and it will give you the options for creating a new Content Group.
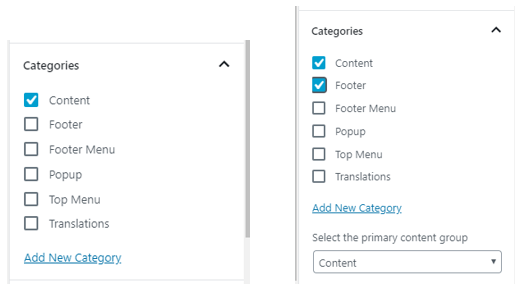
If you assign Static Content to more than one Content Group, you can select the primary group by clicking "Make primary" next to the appropriate Content Group. The primary Content Group will be used to generate the URL for the Static Content.
Tags
This allows you to assign Tags to the Static Content, which are often used to denote the type of content within a blog post. To add a new Tag, just type it in the box and click the "Add" button. If the Tag does not already exist, it will be created.
Featured Image
If you are using the Static Content as a blog post, you may want to set a featured image against it which will be displayed on the blog page of the website. Just click "Set featured image" and select an image from the Media gallery or upload a new one.