Adding new Static Content
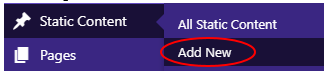
1. On the right-hand menu, go to "Static Content" -> "Add New".
2. Enter a title for the piece of Static Content.

3. Enter the content for the Static Content, either using the editor in the visual or text mode.

4. Assign the piece of Static Content to one or more Content Group, if applicable. If you want the Static Content to be a stand-alone page, then you can leave it unassigned.
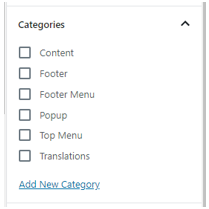
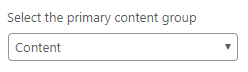
NOTE: The Content Group that you assign the Static Content to will alter the URL for the Static Content. For example, the standard URL for a piece of Static Content is "/content/" followed by the title, but if you assign the Static Content to the blog Content Group, the URL will change to "/blog/" followed by the title.If you assign the Static Content to more than one Content Group, you will be given the option to choose a primary Content Group, which will be used to decide the make-up of the URL. To change this, just click "Make Primary" next to the content group.
5. Setup the KC:Web settings for the Static Content.
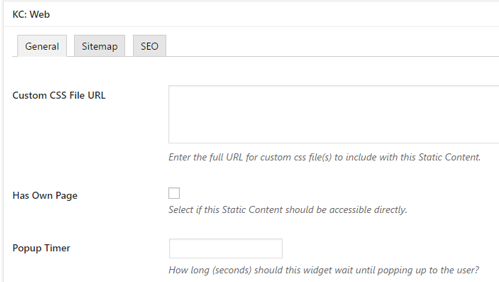
The main option to set is "Has Own Page", as this denotes if the Static Content can be accessed directly via its URL or not. If you want the Static Content to be a stand-alone page, it must have this option ticked.
6. Once everything is setup, click the "Publish" button to save the Static Content.

NOTE: If you wish to create the Static Content but not publish it straight away, you can instead click the "Save Draft" button, which will save the Static Content, but not make it accessible to anyone other than an admin.
